Daylight Doesn't Care About Your Spec Sheet: A Reality Check on $300 Field Monitors
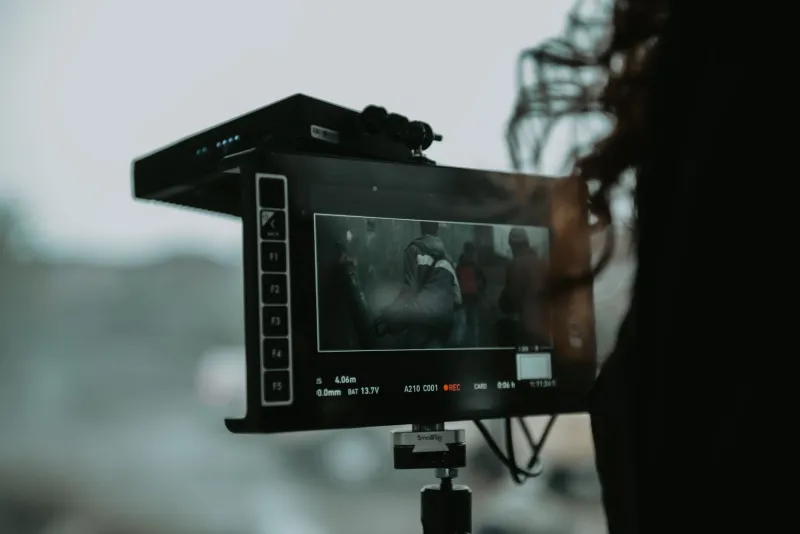
Every spring, a fresh crop of 5- and 7-inch monitors shows up with a spec sheet that reads like a superhero origin story. Two thousand nits. Ten-bit panel. Full waveform suite. Three hundred bucks. Then you take one outside on a Saturday shoot in Arizona and discover that "2000 nits" is a measurement taken in a lab with the sun politely turned off.
This isn't a hit piece on budget monitors. A decent small panel can genuinely save a shot. But the gap between what the box promises and what your eyes see in uncontrolled light is wide enough to drive a rental van through, and it's worth understanding before you drop $300 on the wrong one.
What "Nits" Actually Measure (and What They Don't)
A nit is a candela per square meter — a raw luminance figure. Manufacturers measure peak brightness in the best-case scenario: brightest setting, a test pattern that lights up the whole screen, no reflections, no loupe. Real daylight is a different animal. Direct sun on a glossy panel can wash out a monitor that claims 1,000 nits, because the reflection off the glass competes with the image itself.
A few practical thresholds worth remembering:
- Under 500 nits: Fine in a dark room or a tent. Basically unusable in open shade with sky behind you.
- 700–1,000 nits: Workable in shade or overcast, especially with a hood. Marginal in direct sun.
- 1,000+ nits: Where daylight shooting starts to feel realistic — but only if the panel is matte and you're using a sun hood.
Most $300 monitors cluster in the 700–1,000 nit range on paper. The ones that look best outside usually aren't the brightest — they're the ones with the least glare and the best contrast handling. A matte finish and a $20 fabric hood will beat an extra 300 nits every time.
Bit Depth: The Spec Nobody Explains
You'll see "8-bit + FRC" and "true 10-bit" thrown around. Here's the short version: 8-bit gives you 256 steps per color channel. Ten-bit gives you 1,024. That matters for banding in gradients — think a sunset sky or a foggy exterior — and for judging a log image before you grade it.
On a $300 monitor, "10-bit" is almost always 8-bit plus frame rate control, which fakes the extra steps by flickering between adjacent values. It's fine for framing and focus. It is not a reliable grading reference. If you're making color decisions on set, you want a panel you trust, and a budget monitor is not that panel — your calibrated desktop display is.
What bit depth does buy you on a cheap field monitor: a slightly cleaner-looking image in the shadows and fewer obvious stair-step artifacts when you're staring at a flat log picture all day. Nice to have. Not worth paying a premium for.
False Color Is the Actual Feature
If there's one reason to buy a budget monitor instead of squinting at your camera's LCD, it's exposure tools. False color maps luminance to distinct hues so you can see exactly where your highlights clip and where your shadows crush. On a $300 panel, false color is usually implemented well enough to be genuinely useful — it doesn't require a great screen, just correct math.
Pair it with a waveform and zebras and you've got a real exposure workflow. That combination is what separates a $300 monitor from a $60 HDMI screen: not the panel quality, but the overlays.
A word of caution: false color profiles vary by brand. Some map middle gray to green, others to gray. Learn your monitor's scale before you're on set at 6 a.m. with talent waiting.
Lag, Power, and the Stuff That Ruins Takes
HDMI lag is the quiet killer. Most budget monitors run 1–3 frames of latency. That's invisible when you're checking focus on a locked-off shot, and maddening when you're pulling focus on a moving subject. If your monitor has a "game mode" or low-latency setting, use it — you'll usually trade some image processing for responsiveness.
Power is the other reality check. Many $300 monitors ship with a battery plate for one specific mount (often Sony NP-F), and that's it. If your kit runs on V-mount or USB-C PD, check compatibility before you buy. A monitor that needs a $70 adapter and a $40 battery is a $410 monitor.
And mounting: small panels are heavier than they look, and the 1/4"-20 thread on the bottom of a cheap monitor is often the weakest point in your rig. Plan on a proper articulating arm, not the flimsy one in the box.
When a Tablet or Your Camera LCD Wins
Honest answer for a lot of indie shoots: your camera's built-in LCD is fine for framing, and a tablet running a wireless monitoring app covers the director's chair. Neither gives you false color or a waveform (well, some camera apps do), but neither costs $300 either.
Buy a field monitor when you need exposure tools you can trust outdoors, a bigger image for critical focus, or a screen the director can actually see. Those are real problems. "My monitor is brighter than my LCD" is usually not, once you add a hood.
The Bottom Line
At $300, shop for glare control, honest exposure overlays, low latency, and power flexibility — in roughly that order. Treat the nit number as a starting point, not a promise, and assume every panel needs a hood. Buy from a retailer with a return window, take it outside on day one, and judge it in the light you actually shoot in. Daylight, after all, doesn't read spec sheets.